Extending Entities
Learn how to continue developing on top of the generated application code, by extending the initially generated entity with new attributes.
- how to continue developing on top of the generated application code
- GraphQL API: how to extend the initially created entity with new attributes
- Admin Area: how to extend the initially created form with new form fields
In order to follow this tutorial, you must use Webiny version 5.9.0 or greater.
Overview
Initially, the CarManufacturer  entity that was created in the scaffolding process only contains two attributes:
 title and description . Of course, these are just starter attributes and we are certainly encouraged to extend the entity with additional ones.
Let’s see how we can add the new isPopular boolean attribute to the CarManufacturer entity, and then, via the new Admin Area application module, enable logged-in users to modify its value, by adding a simple Switch form field to the Car Manufacturers form.
GraphQL API
Starting from the GraphQL API, let’s open our CarManufacturer entity and simply define the new attribute on it (parts of code removed for brevity):
(...)

export default new Entity<CarManufacturerEntity>({
    table,
    name: "CarManufacturers",
    timestamps: false,
    attributes: {
        PK: { partitionKey: true },
        SK: { sortKey: true },
        id: { type: "string" },
        title: { type: "string" },
        description: { type: "string" },
        isPopular: { type: "boolean" },
        createdOn: { type: "string" },
        savedOn: { type: "string" },
        createdBy: { type: "map" },
        webinyVersion: { type: "string" }
    }
});
Notice how we’re passing the CarManufacturerEntity interface upon instantiating the Entity class. Since the interface is essentially listing all attributes that our entity consists of, let’s update it as well:
(...)

export interface CarManufacturerEntity {
    PK: string;
    SK: string;
    id: string;
    title: string;
    description?: string;
    isPopular?: boolean;
    createdOn: string;
    savedOn: string;
    createdBy: Pick<SecurityIdentity, "id" | "displayName" | "type">;
    webinyVersion: string;
}

(...)
Finally, let’s update our CarManufacturer GraphQL types in our schema, located in the typeDefs.ts file:
export default /* GraphQL */ `
    type CarManufacturer {
        id: ID!
        title: String!
        description: String
        isPopular: Boolean
        createdOn: DateTime!
        savedOn: DateTime!
        createdBy: CarManufacturerCreatedBy
    }

    input CarManufacturerCreateInput {
        title: String!
        description: String
        isPopular: Boolean
    }

    input CarManufacturerUpdateInput {
        title: String
        description: String
        isPopular: Boolean
    }

    (...)
`;webiny watch commands, mentioned in the previous section, the performed application code changes should be automatically rebuilt and redeployed into the cloud.Once we’ve done all of the above shown changes, we can switch to our Admin Area application, and continue by updating the Car Manufacturers form.
Admin Area Application
In the CarManufacturersForm React component, let’s add a new Switch form element, which will enable logged-in users to mark a particular car manufacturer as popular or not popular (parts of code removed for brevity):
(...)

// We've imported the Switch component from the `@webiny/ui` package.
import { Switch } from "@webiny/ui/Switch";

(...)

return (
    <Form data={carManufacturer} onSubmit={onSubmit}>
        {({ data, form, Bind }) => (
            <SimpleForm>
                {loading && <CircularProgress />}
                <SimpleFormHeader title={data.title || "New Car Manufacturer"} />
                <SimpleFormContent>
                    <Grid>
                        (...)

                        <Cell span={12}>
                            <Bind
                                name="isPopular"
                            >
                                <Switch
                                    label={"Popular Car Manufacturer"}
                                    description={"Is this car manufacturer popular?"}
                                />
                            </Bind>
                        </Cell>
                    </Grid>
                </SimpleFormContent>
                <SimpleFormFooter>
                    <ButtonDefault onClick={cancelEditing}>Cancel</ButtonDefault>
                    <ButtonPrimary onClick={form.submit}>Save Car Manufacturer</ButtonPrimary>
                </SimpleFormFooter>
            </SimpleForm>
        )}
    </Form>
);
Once we’ve updated the CarManufacturersForm React component, the form itself should look like the following:
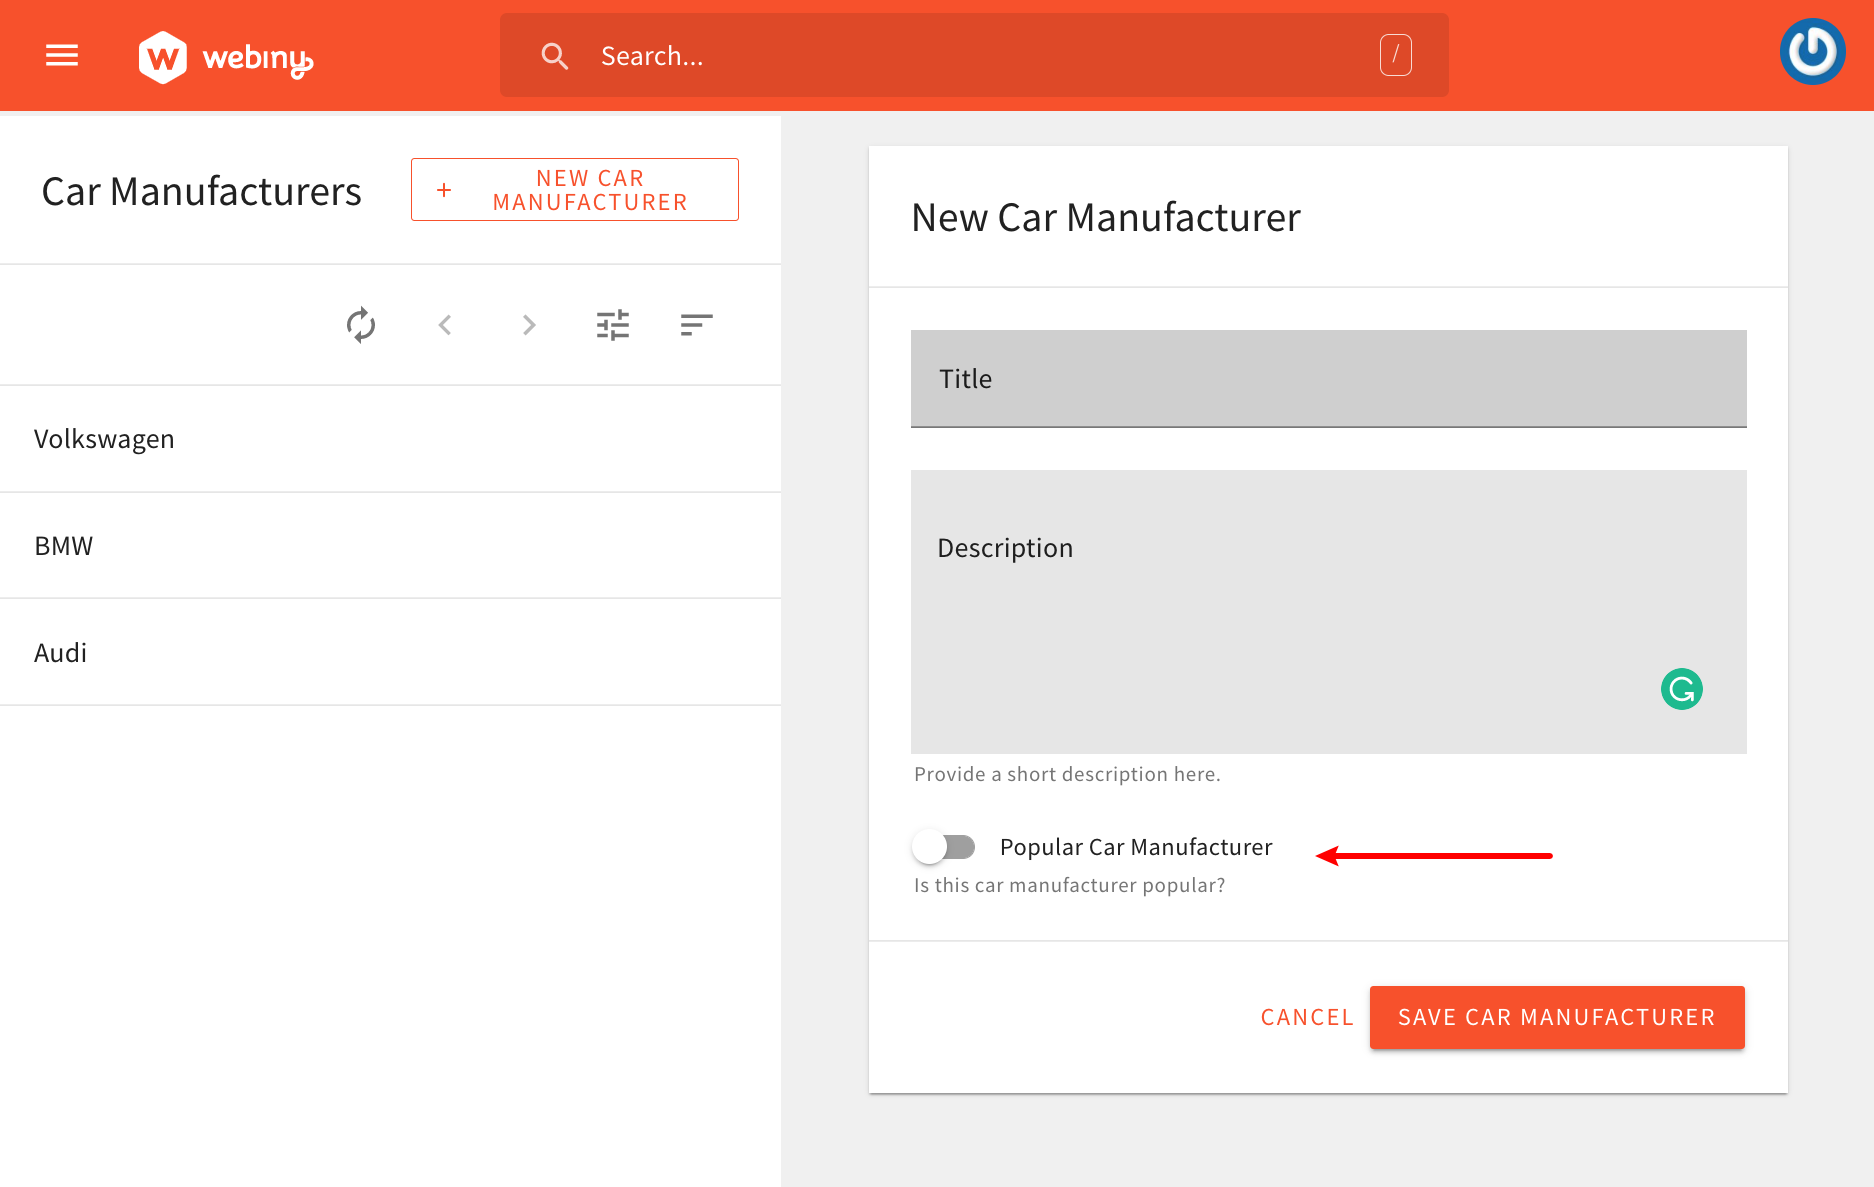 Updated Car Manufacturers Form
Finally, we need to add the isPopular field to all relevant GraphQL query and mutation operations. This ensures that we’re both sending and receiving the isPopular value while interacting with the GraphQL API.
Adding the isPopular field can be easily done by updating the CAR_MANUFACTURER_FIELDS_FRAGMENT GraphQL fragment, located in the graphql.ts file:
import gql from "graphql-tag";

export const CAR_MANUFACTURER_FIELDS = /* GraphQL */ `
  fragment CarManufacturerFields on CarManufacturer {
    id
    title
    description
    isPopular
    createdOn
    savedOn
    createdBy
  }
`;

(...)
With this final change in place, we should be able to edit the isPopular attribute for each car manufacturer entry. To test this, we can simply open an existing entry, try marking it as popular, and submitting the form. If everything was done correctly, the form submission should be successful.
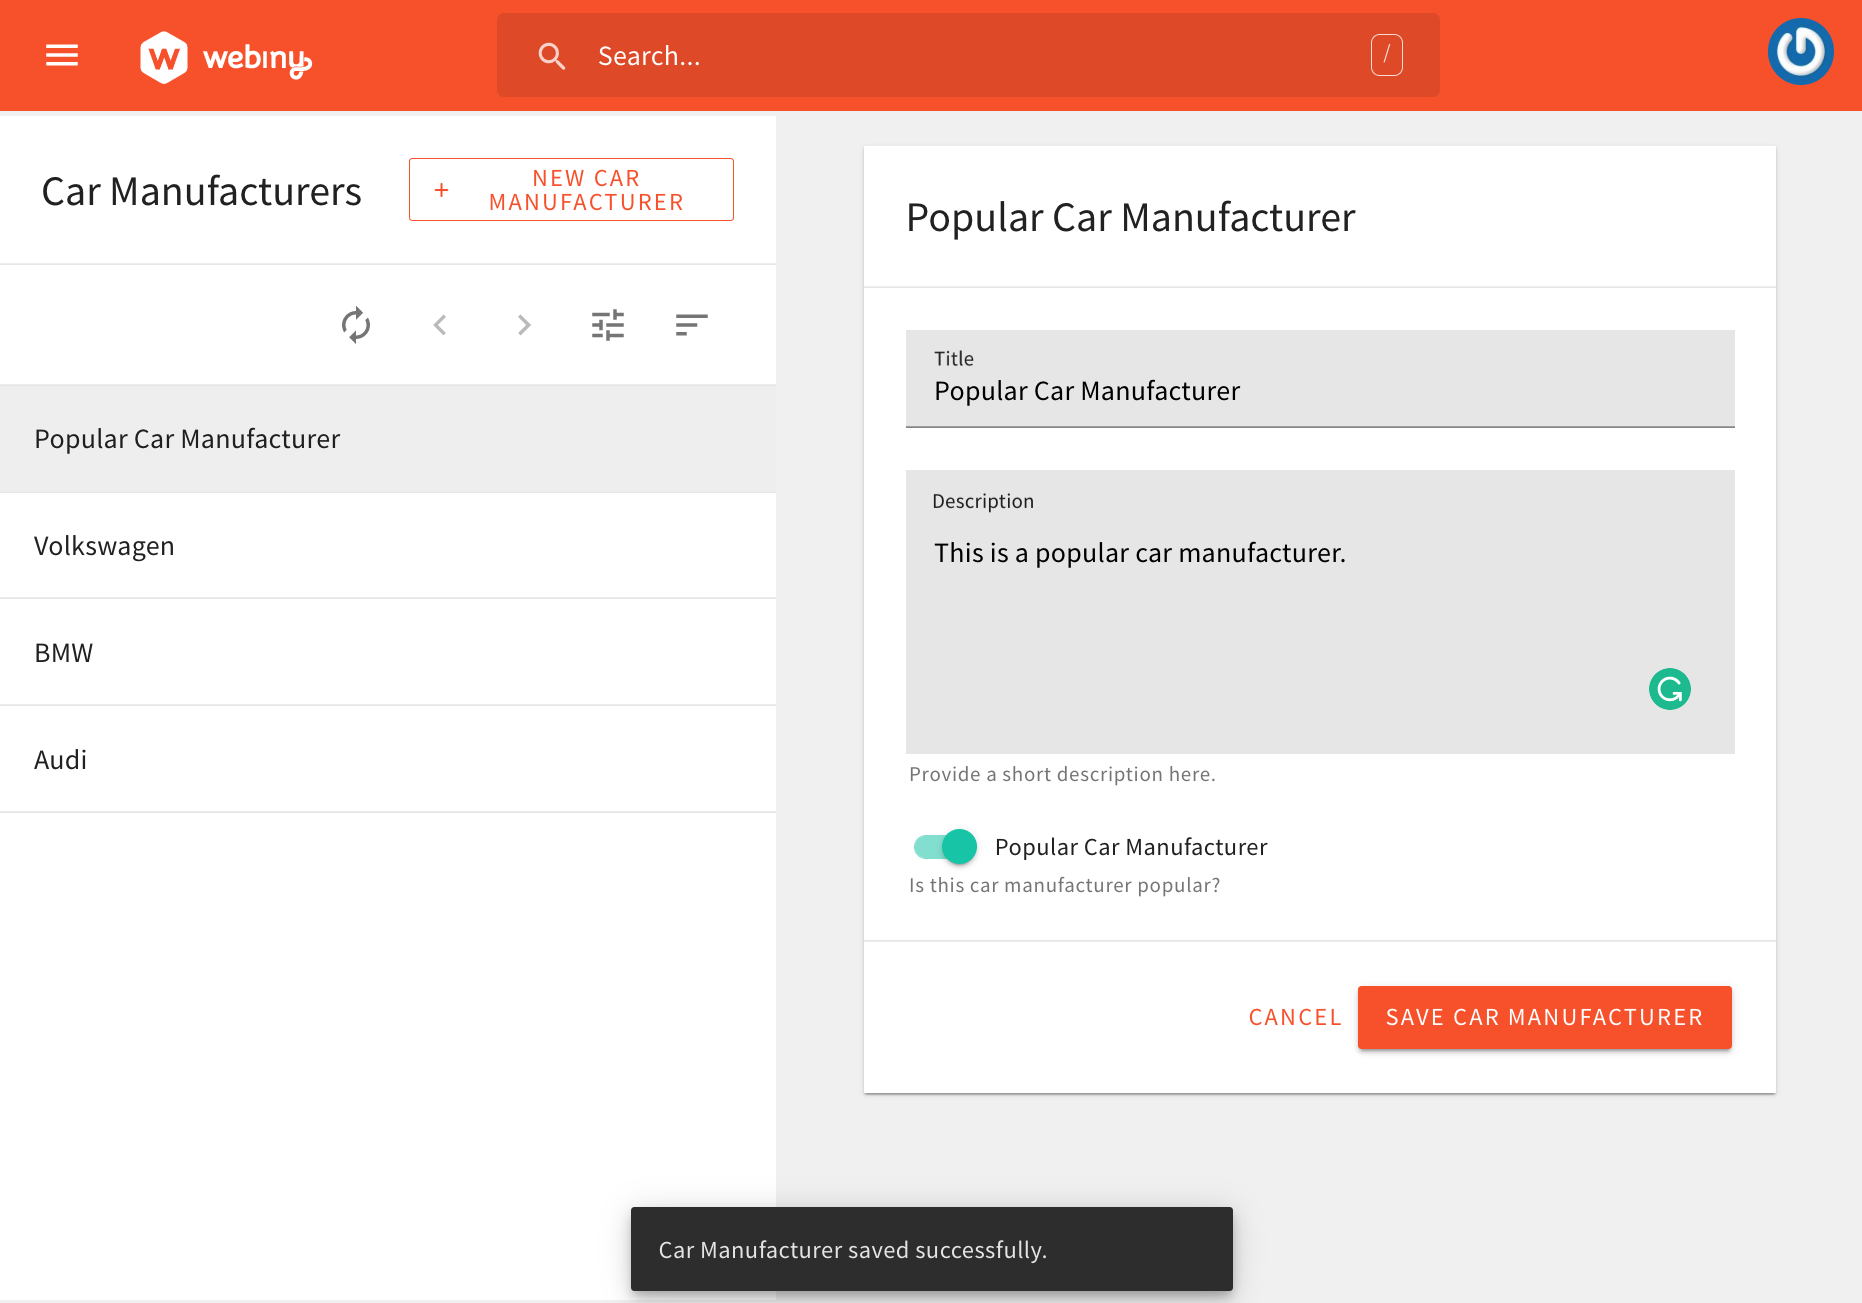 Updated Car Manufacturers Form
FAQ
I See DynamoDB Toolbox Is Being Used for Interacting With Amazon DynamoDB. Can I Use a Different Library?
On the GraphQL API side, you might have noticed we’re using DynamoDB Toolbox , which is a neat little library that makes interaction with DynamoDB a bit easier. But, note that if you wanted, you could easily replace it with the default AWS DynamoDB Document Client or maybe some other preferred library.
Can I Bring My Own NPM Libraries?
You are free to bring your own preferred NPM libraries.
How Can I Perform Data Validation?
For data validation in general, we recommend you check out the @webiny/validation library. It’s easy to use, provides a plethora of different data validation rules, and also enables you to expand it with your own.
What About Security (Authentication and Authorization)?
Because this is not something we can effectively predict, the generated application code does not include any authentication and authorization logic. But luckily, with a couple of built-in utilities, this is not too hard to implement.