Create a Custom Field Type
Create a Webiny Headless CMS Custom Field Plugin.
- how to create a new content model field plugin
- how a plugin stores and retrieves data
The complete code of this tutorial can also be found in our GitHub examples repository  .
.
Overview
Webiny Headless CMS comes with a predefined set of content model fields. But, you can also create your own custom fields, to expand the built-in functionality. In this tutorial, we’ll learn the anatomy of a Headless CMS field, and, as an example, create a custom field plugin to store encrypted data into the database, and decrypt it after retrieving it from the database.
Plugins
Plugins are a vital part of Webiny, and the majority of Webiny’s functionality lives in plugins. You can learn more about plugins here.We will create our custom field with the help of plugins. Plugins will construct every part of the custom field i.e. we will create a plugin to list our new field in the fields list, another plugin to render the field, another one to store and retrieve data.
Webiny has five plugin types to create a custom CMS field. Out of these, three are mandatory, and two are optional. Let’s briefly discuss these plugin types in this section, and in the further sections, we will see them in action.
CmsEditorFieldTypePlugin is used to define the field and is responsible for showing the field in the fields list, within the content model editor UI.CmsEditorFieldRendererPlugin is responsible for rendering of the field in the content entry form (when you’re creating the actual content).CmsModelFieldToGraphQLPlugin is used to define the field in the GraphQL API. It is responsible for defining field’s schema types, inputs, resolvers, etc.The three plugin types we covered above are mandatory to create a custom field, and the following two are optional.
CmsModelFieldToStoragePlugin handles storage transformations, i.e. you can modify the data before passing it to your storage layer, and also manipulate it after retrieval. In this tutorial, we will encrypt and decrypt our field data using this plugin type.CmsModelFieldToElasticSearchPlugin defines transformations to run on a field with Elasticsearch interaction i.e. you can execute the transformations before and after you interact with the Elasticsearch index. Often, data stored to Elasticsearch is not stored in its original form, and requires some preparation to be properly indexed, or even excluded from indexing. This plugin gives you full control over how you store and retrieve data to, and from Elasticsearch.
Now, let’s start building our custom field and see these plugins in action. We will name the new custom field Secret Text, as we’ll be storing the text value as an encrypted string.
Field Type Plugin
We will start by creating a field type plugin (CmsEditorFieldTypePlugin) to define the field and to show it in the field list in the content model editor.
- Create
fields/secretTextdirectory inapps/admin/src/plugins/headlessCMS. - Create a file
secretTextFieldPlugin.tsx in the newly created directory.
import React from "react";
import { CmsEditorFieldTypePlugin } from "@webiny/app-headless-cms/types";

const TextIcon: React.FunctionComponent = () => <i>icon</i>;

const plugin: CmsEditorFieldTypePlugin = {
  type: "cms-editor-field-type",
  name: "cms-editor-field-type-secret-text",
  field: {
    type: "secret-text",
    label: "Secret Text",
    description: "Store encrypted text into the database.",
    icon: <TextIcon />,
    allowMultipleValues: false,
    allowPredefinedValues: false,
    multipleValuesLabel: "Use as a list of text values",
    createField() {
      return {
        type: "secret-text",
        validation: [],
        renderer: {
          name: ""
        }
      };
    }
  }
};

export default plugin;- Import this new plugin in
apps/admin/src/plugins/headlessCms.ts.
(...)import richTextEditor from "./headlessCMS/richTextEditor";
// Import the `secretTextFieldPlugin` pluginimport secretTextFieldPlugin from "./headlessCMS/fields/secretText/secretTextFieldPlugin"
export default [ headlessCmsPlugins(), richTextEditor, // Rest of the plugins (...) objectFieldRenderer, secretTextFieldPlugin];webiny watch command to start a new watch session on apps/admin application code.yarn webiny watch apps/admin --env dev
This command will build our application and will serve the Admin Area application locally. It will also detect all changes in apps/admin and live rebuild the application.
As a result, our new field should be shown in Fields menu:
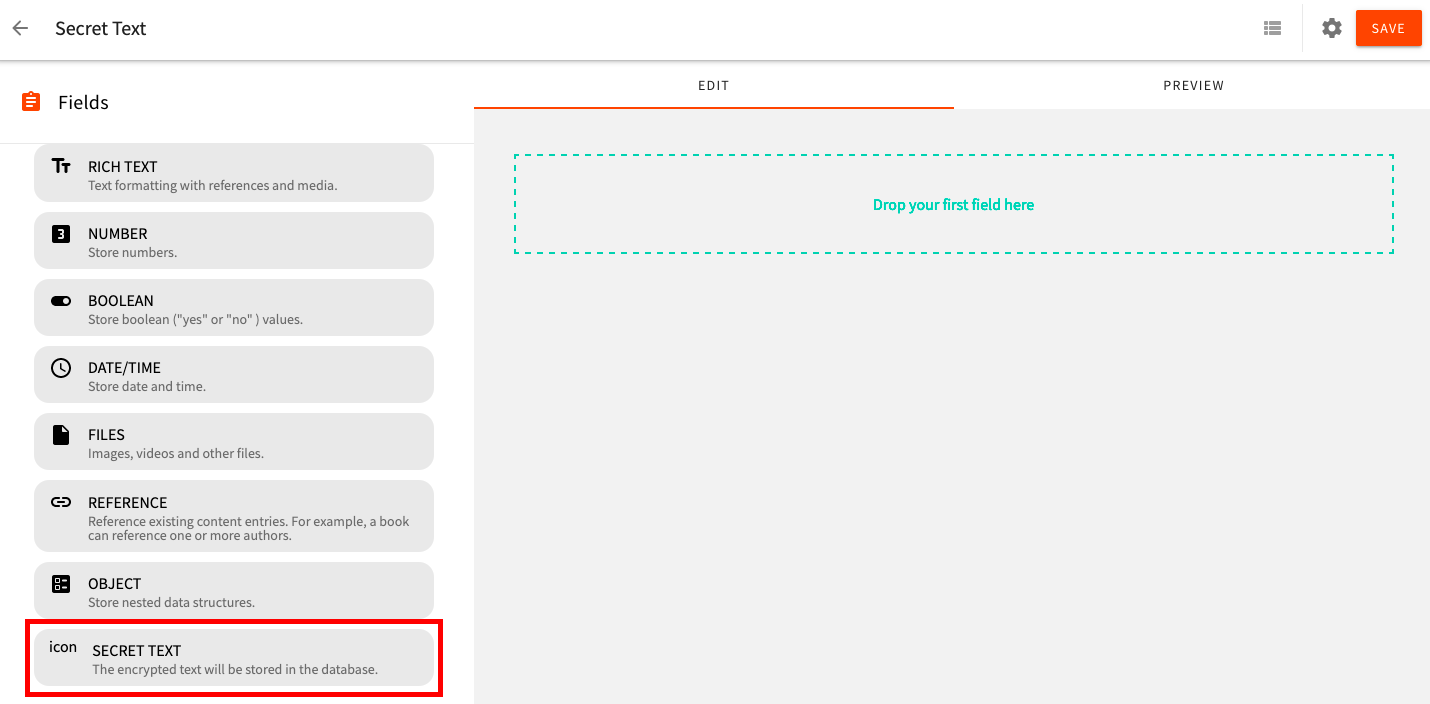 Field Definition
Field Renderer Plugin
As our next step, we’ll define a renderer for our new field. The renderer determines how this field will be rendered in the content entry form, when you create/update your data. We’ll be using the CmsEditorFieldRendererPlugin plugin type.
- Create a file
secretTextFieldRendererPlugin.tsx in apps/admin/src/plugins/headlessCMS/fields/secretTextdirectory.
import React from "react";
import { CmsEditorFieldRendererPlugin } from "@webiny/app-headless-cms/types";
import { Input } from "@webiny/ui/Input";

export default (): CmsEditorFieldRendererPlugin => ({
  type: "cms-editor-field-renderer",
  name: "cms-editor-field-renderer-secret-text",
  renderer: {
    rendererName: "secret-text",
    name: `Secret Text`,
    description: `Enter the text to encrypt`,
    canUse({ field }) {
      return field.type === "secret-text";
    },
    render({ field, getBind }) {
      const Bind = getBind();

      return (
        <Bind>
          {bind => (
            <Input
              {...bind}
              label={field.label}
              placeholder={field.placeholderText}
              description={field.helpText}
            />
          )}
        </Bind>
      );
    }
  }
});- Import this new plugin in
apps/admin/src/plugins/headlessCms.ts.
  (...)  import richTextEditor from "./headlessCMS/richTextEditor";
  // Import the `secretTextFieldRendererPlugin` plugin  import secretTextFieldRendererPlugin from "./headlessCMS/fields/secretText/secretTextFieldRendererPlugin"
export default [ headlessCmsPlugins(), richTextEditor, // Rest of the plugins (...) objectFieldRenderer, secretTextFieldPlugin, secretTextFieldRendererPlugin() ];- As the
webiny watchcommand is already running onapps/admin, we should see these changes immediately. Drag and drop the Secret Text field to create a model and navigate to the PREVIEW tab; you should see an input field here: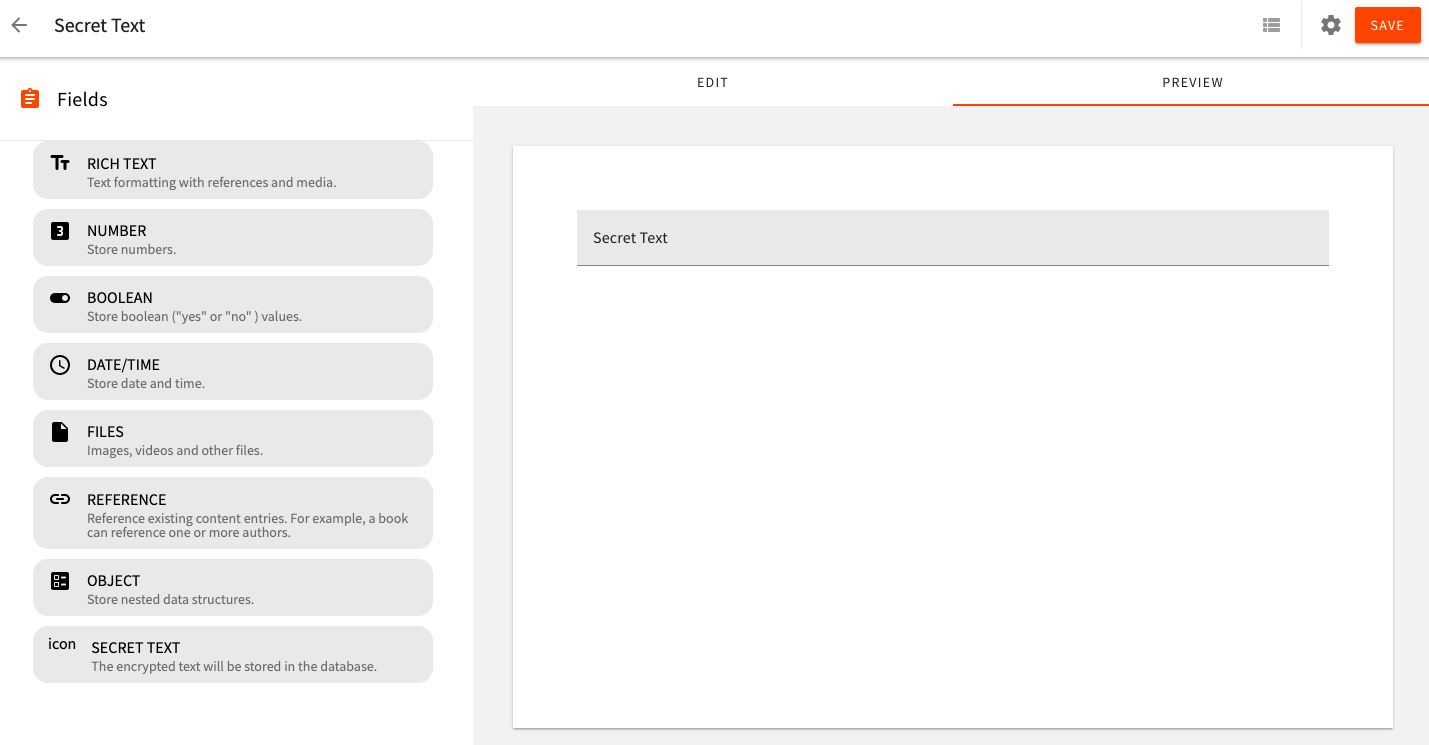 Field Rendered(click to enlarge)
Cool, so far, we are done with the UI part of the custom field. In the next step, we will handle the GraphQL part by creating a Field to GraphQL API plugin (CmsModelFieldToGraphQLPlugin) for the Secret Text field.
Field to GraphQL Plugin
- Create
fields/secretTextdirectory inapps/api/headlessCMS/src. - Create a file
secretTextFieldPlugin.ts in newly created directory.
import { CmsModelField, CmsModelFieldToGraphQLPlugin } from "@webiny/api-headless-cms/types";

interface CreateListFiltersParams {
  field: CmsModelField;
}

const createListFilters = ({ field }: CreateListFiltersParams) => {
  return `
          ${field.fieldId}: String
          ${field.fieldId}_not: String
          ${field.fieldId}_in: [String]
          ${field.fieldId}_not_in: [String]
          ${field.fieldId}_contains: String
          ${field.fieldId}_not_contains: String
      `;
};

const plugin: CmsModelFieldToGraphQLPlugin = {
  name: "cms-model-field-to-graphql-secret-text",
  type: "cms-model-field-to-graphql",
  fieldType: "secret-text",
  isSortable: true,
  isSearchable: true,
  read: {
    createTypeField({ field }) {
      return `${field.fieldId}: String`;
    },
    createGetFilters({ field }) {
      return `${field.fieldId}: String`;
    },
    createListFilters
  },
  manage: {
    createListFilters,
    createTypeField({ field }) {
      return `${field.fieldId}: String`;
    },
    createInputField({ field }) {
      return field.fieldId + ": String";
    }
  }
};

export default plugin;- Import this new plugin in
apps/api/headlessCMS/src/index.ts.
(...)import scaffoldsPlugins from "./plugins/scaffolds";
// Import the `secretTextFieldPlugin` pluginimport secretTextFieldPlugin from "./fields/secretText/secretTextFieldPlugin"
export const handler = createHandler({ plugins: [ // Rest of the plugins (...) scaffoldsPlugins(), secretTextFieldPlugin (...)});- Deploy the API changes, run the
webiny watchcommand to start a new watch session onapps/api/headlessCMSapplication code.
yarn webiny watch apps/api/headlessCMS --env dev
Super, we are all set to use our new field in the CMS model. At this stage, our custom field will behave like a normal text. In the second part of this tutorial, we will encrypt the data before storing it into the database and decrypt it while retrieving it.
As mentioned earlier, the three plugins we’ve created so far are mandatory for creating a custom field. The plugins discussed in the next section are optional, and can be used based on your requirements.
Storage Transformations
CmsModelFieldToStoragePlugin plugin is used to manipulate the data before passing it to the storage layer, and also to modify data while retrieving it. In our case, we will encrypt the data before storing it, and decrypt it after retrieval.
For encryption and decryption, we will use the cryptr package.
To install it, we can run the following command from our project root:
yarn workspace api-headless-cms add cryptr

yarn workspace api-headless-cms add @types/cryptryarn workspace command and specify the workspace name (api-headless-cms) in order to add the cryptr NPM package. This is because every Webiny project is organized as a monorepo and can consist of multiple workspaces. To learn more, check out the Monorepo Organization key topic.Now, let’s proceed by creating a CmsModelFieldToStoragePlugin plugin for the Secret Text field.
As a first step, we will encrypt data before storing it in the database.
Create a file secretTextFieldStoragePlugin.ts in apps/api/headlessCMS/src/fields/secretText directory.
import { StorageTransformPlugin } from "@webiny/api-headless-cms";
import cryptr from "cryptr";

const plugin = new StorageTransformPlugin({
  fieldType: "secret-text",
  toStorage: async ({ value, field }) => {
    const encryptText = new cryptr("myTotallySecretKey").encrypt(value);
    return {
      value: encryptText
    };
  },
  fromStorage: async ({ value, field }) => {
    return value.value;
  }
});

export default () => {
  return plugin;
};
As a next step, import this new plugin in apps/api/headlessCMS/src/index.ts.
(...)import scaffoldsPlugins from "./plugins/scaffolds";
// Import the `secretTextFieldStoragePlugin` pluginimport secretTextFieldStoragePlugin from "./fields/secretText/secretTextFieldStoragePlugin"
export const handler = createHandler({  plugins: [  // Rest of the plugins  (...)  elasticsearchDataGzipCompression(),  secretTextFieldPlugin,  secretTextFieldStoragePlugin()  (...)});
Now, let’s create a content entry with our new field.
 Encrypted Text
As we can see in the video above, when you create the entry and save it, you will see encrypted data in the input text field because, as per our current code, we encrypt our data before storing it, but we’re not decrypting it back after retrieving from the database.
In the next step, let’s decrypt the data after we retrieve it.
- Open the
apps/api/headlessCMS/src/fields/secretText/secretTextFieldStoragePlugin.tsfile. - Update the
returnstatement offromStoragefunction with this:
const plugin = new StorageTransformPlugin({
  (...)

  fromStorage: async ({ value, field }) => {
    return new cryptr('myTotallySecretKey').decrypt(value.value)
  }

  (...)
});
With this change, upon retrieving the data, it will be decrypted.
Congratulations! You have created your first custom field for Webiny Headless CMS!
Bonus Step - Elasticsearch Data Transformations
As discussed earlier, another optional plugin type is CmsModelFieldToElasticsearchPlugin.
It is similar to the CmsModelFieldToStoragePlugin plugin type, but works with Elasticsearch, so you can do the transformations before storing the data into the index, and after retrieving it. Here is an example of Field to Elasticsearch Plugin.
For primitive data types fields, isSearchable: true flag will do the work for you for indexing. But if you have a complex field or want to store your field in a certain special way, you can create a plugin of CmsModelFieldToElasticsearchPlugin type.