Mailer
Overview of the package used to send e-mails.
- How to use api-mailer to send e-mails
- How to use api-mailer with basic configuration
- How to use api-mailer with advanced configuration
About
Starting from 5.30.0 version of Webiny we have a mailer package (@webiny/api-mailer) via which you can send e-mails.
The package uses transports to send e-mails. The transport is an implementation of sending the e-mails, and we have few built-in ones.
Available Transports
- Dummy Transport - does not send e-mails, just records them in an array which you can access later
- SMTP Transport - sends e-mails with the use of nodemailer
 library
Dummy Transport
A transport which pretends to be sending e-mails.
It is used for testing and as a backup in case no other transport exists or is not configured.
SMTP Transport
A transport which sends e-mails via the nodemailer library. It requires credentials to be defined, which we will go through.
If this transport fails to be created, it falls back to the Dummy Transport.
Basic Configuration via Environment Variables
The simplest, and most rudimentary, configuration is done via the environment variables:
# required
WEBINY_MAILER_HOST=smtp.webiny.com
WEBINY_MAILER_PORT=25
WEBINY_MAILER_USER=root
WEBINY_MAILER_PASSWORD=password
WEBINY_MAILER_REPLY_TO=reply-to@webiny.com
# optional
WEBINY_MAILER_FROM=mailing-list@webiny.com
Variables WEBINY_MAILER_HOST, WEBINY_MAILER_USER, WEBINY_MAILER_PASSWORD and WEBINY_MAILER_REPLY_TO must be defined for SMTP Transport to work.
The WEBINY_MAILER_FROM variable is an optional one.
When applying the variables we run them through the validation process, so if any are invalid (for example, you do not put e-mail in WEBINY_MAILER_FROM), the creation process of the transport will fail.
Basic Configuration via Admin UI
Configuring SMTP Transport via the UI is the easiest way to configure the transport.
The “downside” is that, in multi-tenancy systems, you need to store configuration for each tenant. If you do not want to do that, use the configuration via environment variables.
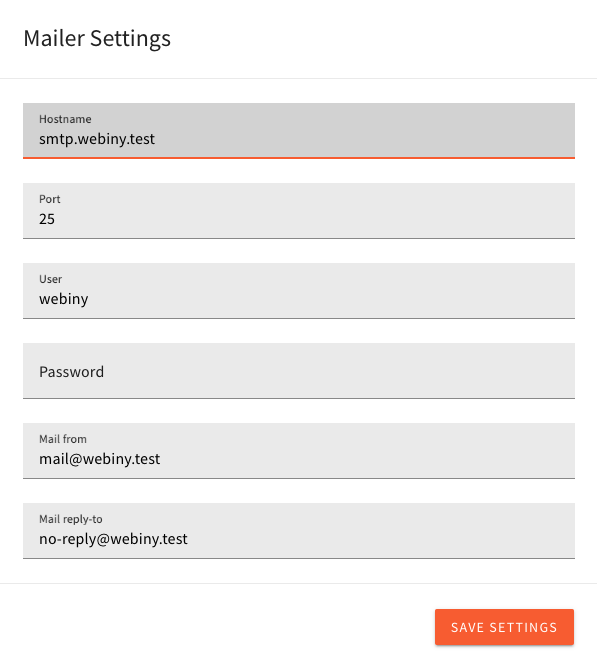 Mailer Settings
Configuration via the UI is not available until you have the WEBINY_MAILER_PASSWORD_SECRET environment variable set.
Since we are storing the password in the database, we need to encrypt it. The WEBINY_MAILER_PASSWORD_SECRET is used as a secret in the crypto-js library’s AES algorithm.
Advanced Configuration via Code
The advanced configuration is done by creating your own SMTP Transport with custom config. You can use our createSmtpMailer method, you just need to pass the custom configuration.
import { createTransport, createSmtpTransport } from "@webiny/api-mailer";

const transport = createTransport(async ({ settings, context }) => {
  return createSmtpTransport({
    ...settings,
    host: "my.changed.host",
    headers: {
      ["my-header"]: "value"
    }
    // ... or what ever you want to change in the SMTP Transport
  });
});

// register in your handler

const handler = createHandler({
  plugins: [
    // existing plugins
    transport
  ]
});
When creating the transport via createTransport, you will get the settings and the context variables. The settings variable contains whatever was defined in either environment variables or the values which were stored via the Mailer Settings UI.
Custom Transport
You can create your own transport if you do not like ours. You just need to use the createTransport method which returns the transport.
import { createTransport } from "@webiny/api-mailer";

const transport = createTransport(async ({ settings, context }) => {
  return myOwnImplementationOfTheTransport({
    ...settings
  });
});

// register in your handler

const handler = createHandler({
  plugins: [
    // existing plugins
    transport
  ]
});
Usage
For example, let’s say you want to send an e-mail when user creates an entry in the Person model.
You would want to subscribe to the onEntryAfterCreate event and send an e-mail only when added entry to that certain model.
const plugin = new ContextPlugin<MailerContext>(async context => {
  context.cms.onEntryAfterCreate.subscribe(async ({ entry, model }) => {
    if (model.modelId !== "person") {
      return;
    }
    try {
      const response = await context.mailer.sendMail({
        to: ["me@test.local"],
        from: "webiny@test.local",
        subject: `A new entry in the ${model.name} model was created`,
        text: `A new entry in the ${model.name} was created. ID of the entry is ${entry.id}`,
        html: `<h2>A new entry in the ${model.name}</h2>
                  <p>Entry ID is ${entry.id}, url is ${createEntryUrl(entry)}</p>`
      });
      if (response.result) {
        return;
      } else if (!response.error) {
        console.log("E-mail was not sent, but there is no error in the response.");
        return;
      }
      console.log(response.error);
    } catch (ex) {
      console.log(ex.message);
    }
  });
});