Environment Variables
Learn what are environment variables and how you can assign them.
- what are environment variables
- how you can assign environment variables in your project applications
Overview
It’s not unusual to have our application code rely on one or more environment variables  . Different pieces of information, like for example, API keys, API URLs, different configuration parameters, or environment metadata, are just some of the things that our application might need in order to work as expected.
In this guide, we cover a couple of different scenarios in which you might need to set them up.
Backend vs. Frontend Development
Webiny is a full-stack solution, which means that developers are able to create both backend and frontend applications, within a single Webiny project.
But, before we continue, have in mind that these are two different types of applications, for which different development practices and technologies apply.
One of the more obvious differences is how we develop them. While frontend application development can be completely done locally, backend application development often involves deploying your code changes to the cloud and then testing them out.
Another difference are environment variables. Depending on the application type, the way we set them up is different, and so is the way they’re being processed in actual runtime.
Backend Development
As mentioned, backend development often involves deploying our code changes into the cloud and then testing them out.
We can use environment variables upon deploying our project applications and underlying cloud infrastructure resources. For example, we might want to pass a specific value to one or more AWS Lambda functions, a specific configuration param to a cloud infrastructure resource, AWS credentials, and more.
deploy command and how to deploy your entire Webiny project. Also, if you’d like to learn more about the deployment process in general, you can also visit our Deployment key topics section.Webiny Environment Variables
Note that, upon executing deployment-related commands, the Webiny CLI automatically injects the following two environment variables into the running process:WEBINY_ENV- environment that was passed via the--envargumentWEBINY_PROJECT_NAME- the project name, set in yourwebiny.project.jsfile (projectRoot)
Custom Environment Variables
With the shown default environment variables, we can, naturally, add our own.
Using .env File
There are a couple of ways to do it, but, for development purposes, the recommended way to do it would be via the .env file, located in your project root.
When you set up a brand new Webiny project, the content of the file might look similar to the following:
# The region into which your project will be deployed.AWS_REGION=eu-central-1
# Needed for project deployment.PULUMI_CONFIG_PASSPHRASE=9f174eea6ec6148dc1467s59b1112591PULUMI_SECRETS_PROVIDER=passphrase
WEBINY_MY_CUSTOM_ENV_VARIABLE=some-random-value
From there, we can easily add additional environment variables, like we did with the WEBINY_MY_CUSTOM_ENV_VARIABLE. Note that all variables with the WEBINY_ prefix will be automatically added to all deployed AWS Lambda functions.
Using Terminal
Apart from setting them via the shown .env file, environment variables can also be set using a terminal of your choice, and a command that’s available on your operating system.
For example, on Linux or MacOS, you can use the export command:
export AWS_PROFILE=my-profileOn Windows, you can utilize the set and setx commands, for example:
setx AWS_PROFILE my-profileThis approach can be used both in development and CI/CD environments, although in case of the latter, using built-in methods for securely storing environment variables is recommended.
CI/CD
Different CI/CD providers offer different options when it comes to setting environment variables. For example, GitHub Actions enable this via repository secrets . On the other hand, if using AWS CodeBuild , you can use the AWS CodePipeline service.
Make sure to read the relevant documentation for best practices around how to properly set environment variables in your CI/CD provider.
Frontend Development
Adding environment variables to your frontend (React) applications is also possible, but it is a bit different than what we’ve seen in the first part of this guide. There are two main differences we need to consider.
Environment Variables Embedded in Application Code
While in the context of backend applications, the environment variables represent values that actually exist in the running Node.js process (accessed via process.env object), for frontend applications, the values are embedded in the application code during the build time.
Local Development - No Deployment Needed
Developing (serverless) backend applications usually entails redeploying your application code, in order to see and test changes that were made. With frontend development, that is not the case, and adding an environment variable locally will usually result in our web development server refreshing the application.
By default, Webiny relies on Create React App , a modern zero-configuration frontend application development tool. To learn more how environment variables work there, please read their Adding Custom Environment Variables article.
By default, every Webiny projects contains two frontend project applications, Admin Area and Website, located in apps/admin and apps/website folders, respectively.
Custom Environment Variables
For frontend applications, environment variables need to be handled in their respective start and build commands. In a Webiny project, these can be found in the webiny.config.ts file, which is the essential configuration file of every package that a project application may hold.
The following code shows the webiny.config.ts file of the website package, which is the one and only package of the Website project application:
(...)
module.exports = {  commands: {      async start(options, context) {          invariant(options.env, NO_ENV_MESSAGE);
          const output = await getStackOutput("api", options.env, MAP);          invariant(output, NO_API_MESSAGE(options.env));
          Object.assign(process.env, output);
          // Add additional environment variables by directly          // assigning them into the "process.env" object.          process.env.REACT_APP_MY_CUSTOM_ENV_VARIABLE = 'some-random-value';
          // Starts local application development.          const watch = createWatchApp({ cwd: __dirname });          await watch(options);      },      async build(options, context) {          invariant(options.env, NO_ENV_MESSAGE);
          const output = await getStackOutput("api", options.env, MAP);          invariant(output, NO_API_MESSAGE(options.env));
          Object.assign(process.env, output);
          // Add additional environment variables by directly          // assigning them into the "process.env" object.          process.env.REACT_APP_MY_CUSTOM_ENV_VARIABLE = 'some-random-value';
          // Creates a production build of your application, ready to be deployed to          // a hosting provider of your choice, for example Amazon S3.          const build = createBuildApp({ cwd: __dirname });          await build(options);      }  }};
In the shown code, we are directly assigning our environment variables to the process.env object, using Object.assign and basic assignment operator (=) .
Note that this will work, but, in case you need a bit more robust solution, you can also require, for example, the dotenv library, and have it load environment variables from .env files. Please consult the library’s documentation for more information on how to use it.
Other Methods
Like we’ve seen in the backend development section, you can also assign environment variables using your terminal of choice, upon running the mentioned watch and build commands.
In CI/CD workflows, again, you’re encouraged to adapt built-in methods for working with environment variables, that are offered by your CI/CD provider.
DEBUG Environment Variable
In order to provide the best possible debugging experience, and at the same time, maintain a strong security posture, Webiny uses the DEBUG environment variable to determine what information needs to be revealed in case one or more errors were thrown in the application runtime.
By default, the DEBUG environment variable is set to true, via the .env file located in your project root. For development purposes, this can useful as you’ll get to see full error reports whenever an error has been returned from for example the GraphQL API, or maybe even in your React application code.
On the other hand, for some pre-production and production environments, most probably you will want to not have this variable set to true, as in some cases, full error reports might reveal sensitive data, and may pose a security vulnerability.
In the following text, we cover a couple of key features that are available while the DEBUG flag is set to true.
Backend Error Reporting
In case of a backend error, for example, an error in a GraphQL resolver function, by default, the client that issued the request will receive the following error response:
{
  "error": {
    "name": "Error",
    "message": "Internal Sever Error"
  }
}
As mentioned, the reason for the obscurity is primarily security, as we want to avoid potential leaking of sensitive information to the public.
On the other hand, for development purposes, setting the DEBUG environment variable to true, will force the backend to return something like the following:
{
  "error": {
    "name": "Error",
    "message": "Unknown type\"Stringgg\". Did you mean \"String\"?",
    "stack": "Error: Unknown type \"Stringgg\". Did you mean \"String\"?\n    at p (/var/task/handler.js:15:52587)\n    at x (/var/task/handler.js:45:166906)\n    at fe (/var/task/handler.js:126:504732)\n    at Ee (/var/task/handler.js:126:514113)\n    at t.createGraphQLSchema (/var/task/handler.js:57:373)\n    at handle (/var/task/handler.js:45:189370)\n    at /var/task/handler.js:45:187469\n    at new Promise (<anonymous>)\n    at i (/var/task/handler.js:45:187419)\n    at /var/task/handler.js:45:187592"
  }
}
You must redeploy your backend project application after updating the environment variables. Otherwise, the change will not be reflected.
Visual Feedback
The DEBUG environment variable can also be used within your frontend (React) applications.
If set to true, all errors detected in the application runtime will be presented within a clear error report, with all of the relevant information like the error message and a complete stack trace:
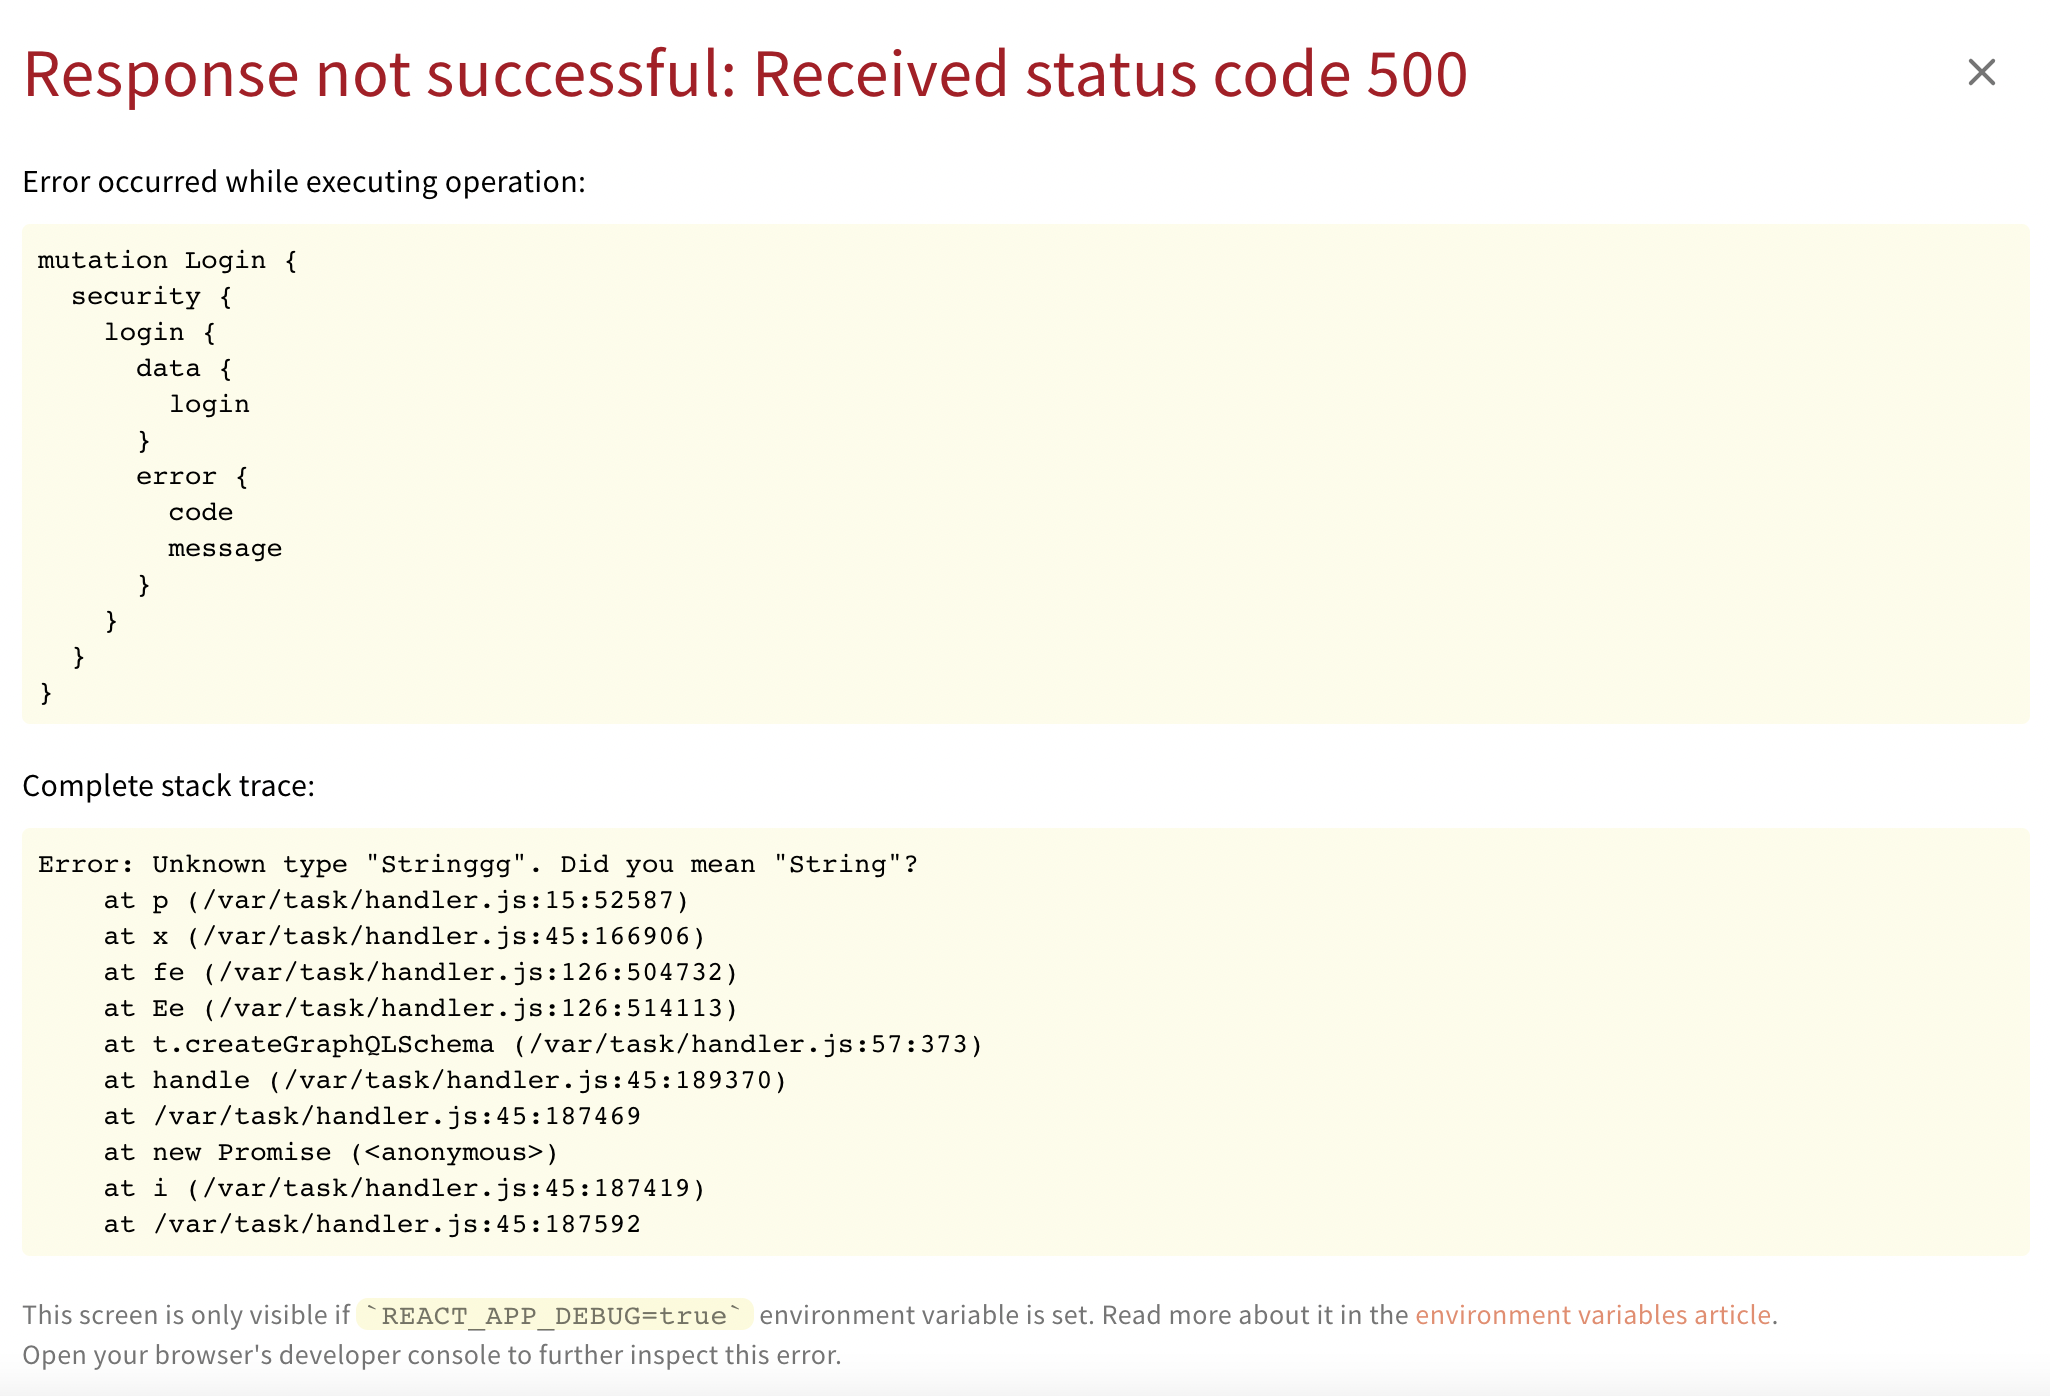 Error overlay in debug mode
The DEBUG environment variable can be set via the application’s webiny.config.ts config file, for example, apps/admin/webiny.config.ts or apps/website/webiny.config.ts :
// Make sure to use the `REACT_APP_` prefix
process.env.REACT_APP_DEBUG = "true";
Enable Webiny Version Header Environment Variable
The WEBINY_ENABLE_VERSION_HEADER environment variable is used to add the Webiny version header to all GraphQL response headers.
By default, version headers are not set into the response headers. If you want the version headers to be included, you must set the environment variable to true.
Only the true word will have effect. If you set it to anything else, WEBINY_ENABLE_VERSION_HEADER will be considered as false / not set.
WEBINY_ENABLE_VERSION_HEADER=trueWhen the environment variable is set to true it will add the x-webiny-version header. Which looks like this:
x-webiny-version: 5.21.0FAQ
Can You Provide Any Details on How the Root .env File Is Loaded?
Behind the scenes, Webiny CLI uses the dotenv library in order to load the shown .env file. Note that the values that are defined in the .env file will not get assigned as environment variables if they were already assigned in the running process (e.g. via terminal, or as a secret in your CI/CD workflow). This is the default behaviour of the dotenv library.What Are the Commands That Will Load the Root .env File?
The following commands load the .env file: deploy, destroy, watch, and pulumi.Is the REACT_APP_ Prefix Necessary When Naming Frontend Environment Variables?
Yes, for frontend applications, the names of environment variables must always be prefixed with the REACT_APP_ prefix.
This is mainly because of the Create React App , which is being utilized as the base tool for frontend application development.